![]()

How to create a flight
Creating a flight at Newsky is easy and intuitive. Here's a step-by-step guide to help you plan your next flight quickly and efficiently.
Step 1: Register with Newsky
To create a flight, you must first log in to Newsky. Go to the Newsky website and create an account if you don't already have one. Once you are logged in, you will be taken to the main dashboard.
Download the Newsky Client from the website and install it.
Important: You must also be a member of our Virtual Airline in Nevsky to create flights. If you haven't already, you can join here.
Step 2: Flight Creation
- Navigate to flight planning: On your dashboard you will find an option for flight planning or “Create Flight”. Click on it to start the process.
- Choose your flight details:
- Type of flight: Choose what type of flight you want to take. There are the following types of flights:
- Free Flight Pax: Here you can freely choose the route and transport passengers.
- Free Flight Cargo: Here you can freely choose the route and transport cargo.
- Schedule Pax: Here you can choose a fixed route and transport passengers.
- Schedule Cargo: Here you can choose a fixed route and transport cargo.

- Start and Destination Airport: Enter the airport you want to depart from and the airport you want to fly to. You can use the ICAO codes or the names of the airports.
- Aircraft Type: Select the aircraft you want to fly. We offer a common selection of aircraft and types. If the type of aircraft you would like to fly is not listed, please contact us in the Discord and we will get you the plane.
- Planning the route: Newsky offers the option of automatically generating the route as long as you have a Simbrief account and a subscription there. You can also create the route manually and fly off. Newsky doesn't really care how you get from A to B.
- Flight time and departure: Enter the expected departure time. This refers to the time at which you will probably leave the ground. If you fly out early or late, that won't be a problem. There may be a small penalty in costs, but the airline will cover this.
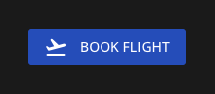
Step 4: Book a flight
After entering all the details, review your information and click “Book Flight” or “Flight Submit”. Your flight will now be saved in the database and marked for flight tracking. Tracking is not yet activated at this point!
Step 5: Preparing for the flight
- Pre-flight check: Before you start your flight, make sure you have made all the preparations. Double-check the aircraft settings and route to avoid possible errors.
- Start simulator: Start your flight simulator and load the route you created with the correct aircraft.
- Start Newsky: Start the Newsky client and start the flight on the dashboard.
Step 6: Execute flight
Start your flight and enjoy the experience! Newsky automatically tracks your flight data so you can concentrate fully on flying. After completing the flight, your statistics will be automatically updated and displayed.
For more information and details about using Newsky, you can visit the official website.